
Overview
Zabbix 8.0 is the next major version of the Zabbix monitoring platform—used to track the health, performance, and availability of IT infrastructure like servers, networks, applications, and cloud services.
Zabbix is an enterprise-grade monitoring system that helps you:
- Monitor servers (Linux, Windows)
- Track network devices (routers, switches, firewalls)
- Monitor applications (databases, web apps, APIs)
- Set alerts (email, Slack, SMS, etc.)
- Visualize data with dashboards and graphs
Note
You may run command with Root
1. Update your system
sudo apt update && sudo apt upgrade -y2. Install Zabbix Repository
wget https://repo.zabbix.com/zabbix/8.0/release/ubuntu/pool/main/z/zabbix-release/zabbix-release_latest_8.0+ubuntu24.04_all.deb
dpkg -i zabbix-release_latest_8.0+ubuntu24.04_all.deb
apt update -y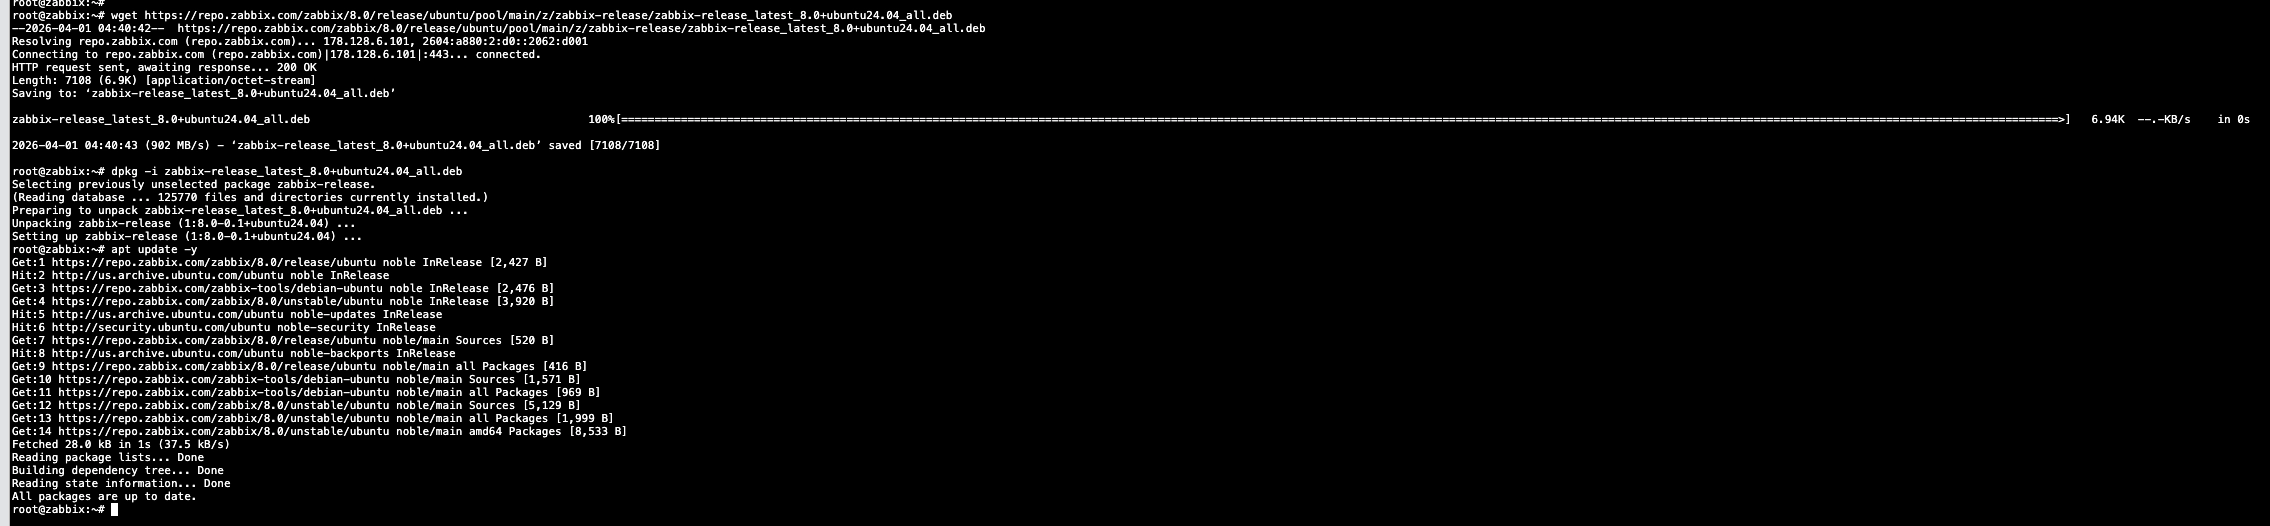
3. Install Zabbix Server and services.
apt install zabbix-server-mysql zabbix-frontend-php zabbix-apache-conf zabbix-sql-scripts zabbix-agent -y4. Create initial database
Before initializing database, you must install MySQL Server first.
apt install mysql-server -y
After MySQL server installed, you are now able to initialize database for zabbix.
In this example:
Database name: zbxdb
Database user: zabbix
Database password: Choose your password
# mysql -uroot -p password
mysql> create database zbxdb character set utf8mb4 collate utf8mb4_bin;
mysql> create user zabbix@localhost identified by 'YOUR-PASSWORD';
mysql> grant all privileges on zbxdb.* to zabbix@localhost; mysql> set global log_bin_trust_function_creators = 1;
mysql> quit;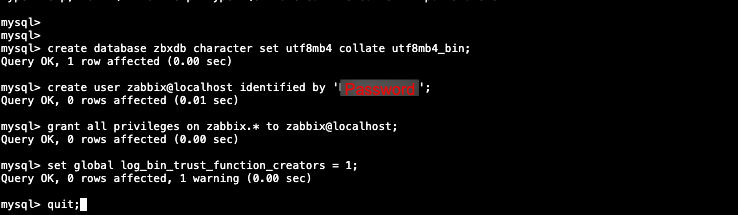
On Zabbix server host import initial schema and data. You will be prompted to enter your newly created password.
zcat /usr/share/zabbix/sql-scripts/mysql/server.sql.gz | mysql --default-character-set=utf8mb4 -u zabbix -p zbxdb
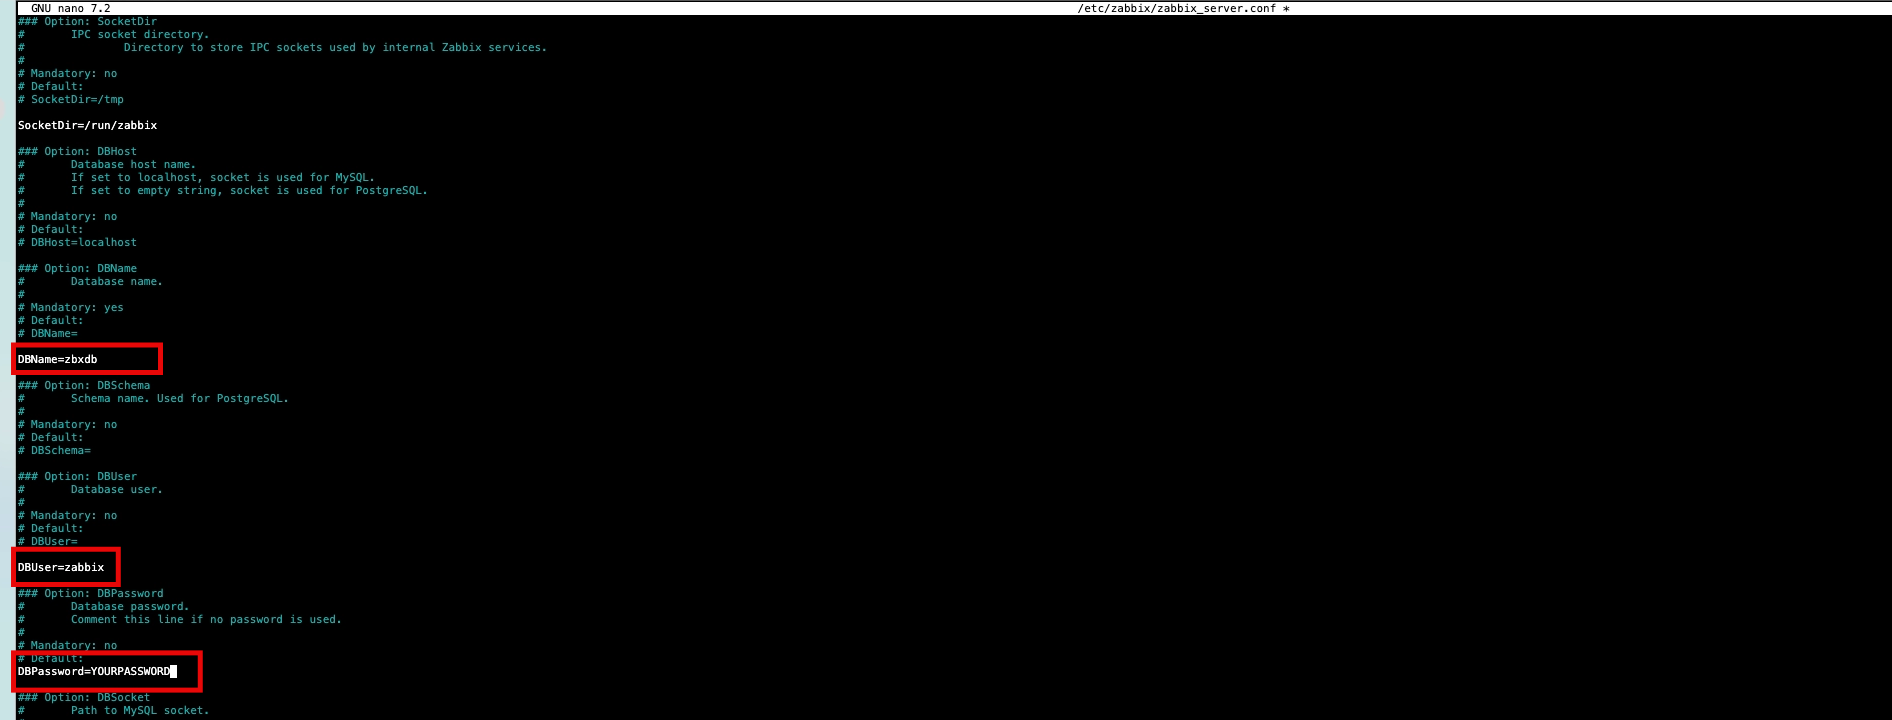
5. Configure the database credentials for Zabbix server
Edit file /etc/zabbix/zabbix_server.conf and save.
6. Start and enable auto-startup Zabbix server and agent processes
Start Zabbix server and agent processes and make it start at system boot.
systemctl restart zabbix-server zabbix-agent apache2
systemctl enable zabbix-server zabbix-agent apache2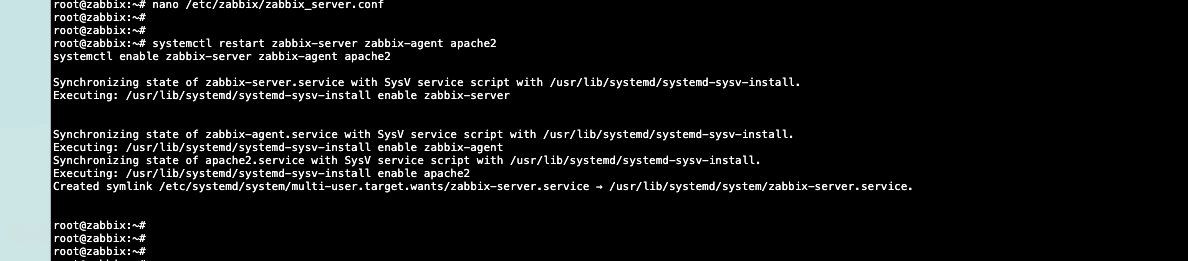
7. Finishing Zabbix Web UI setup
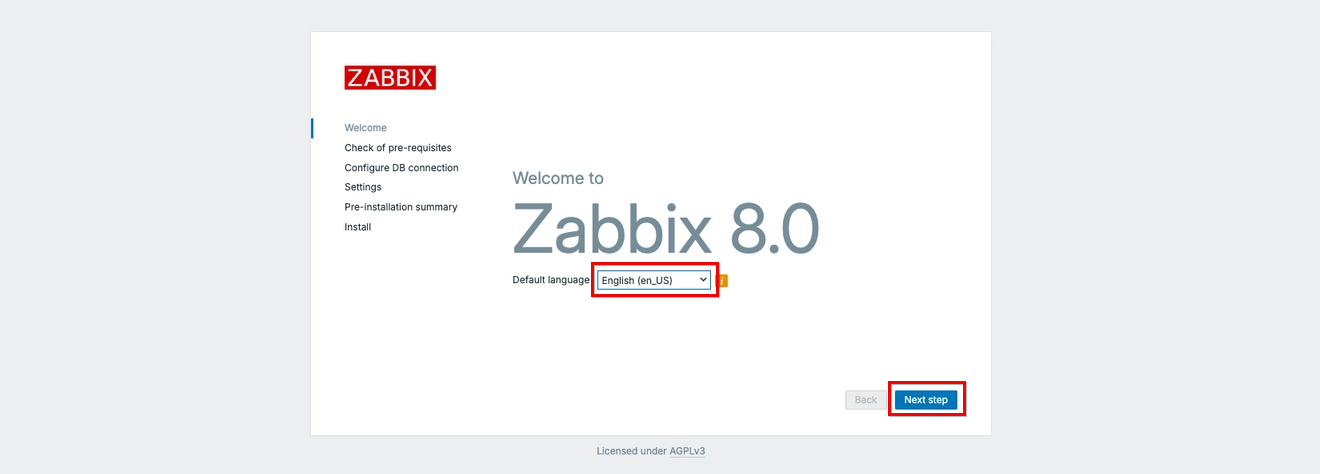
The default URL for Zabbix UI when using Apache web server is http://host/zabbix. On Welcome, select your default language and click Next step
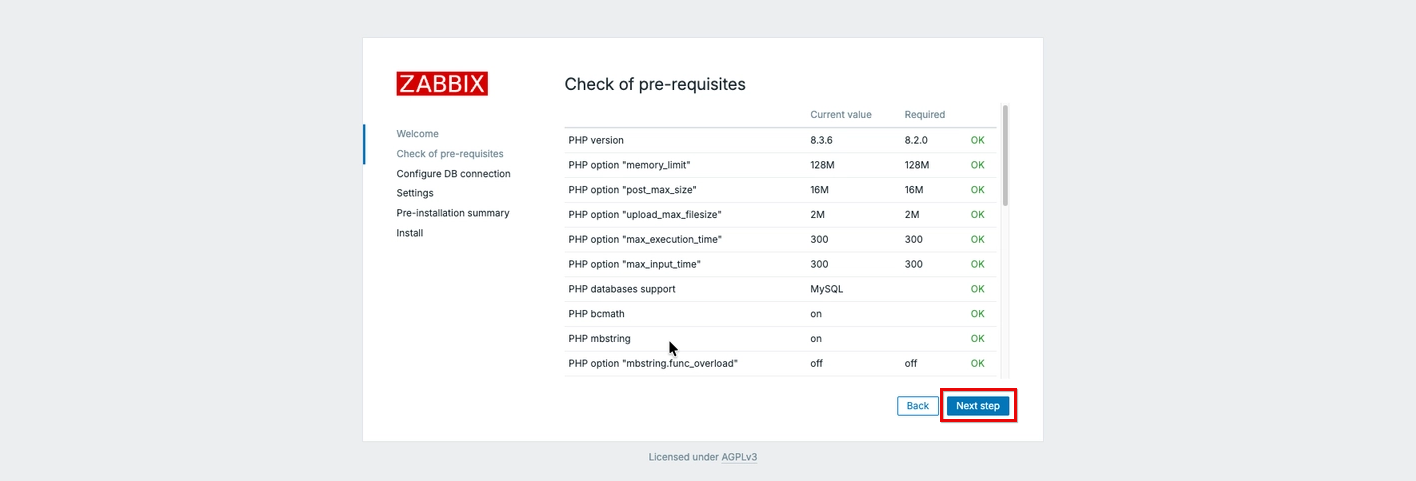
On Check of pre-requisites, make sure you passes all requirement and click on Next step
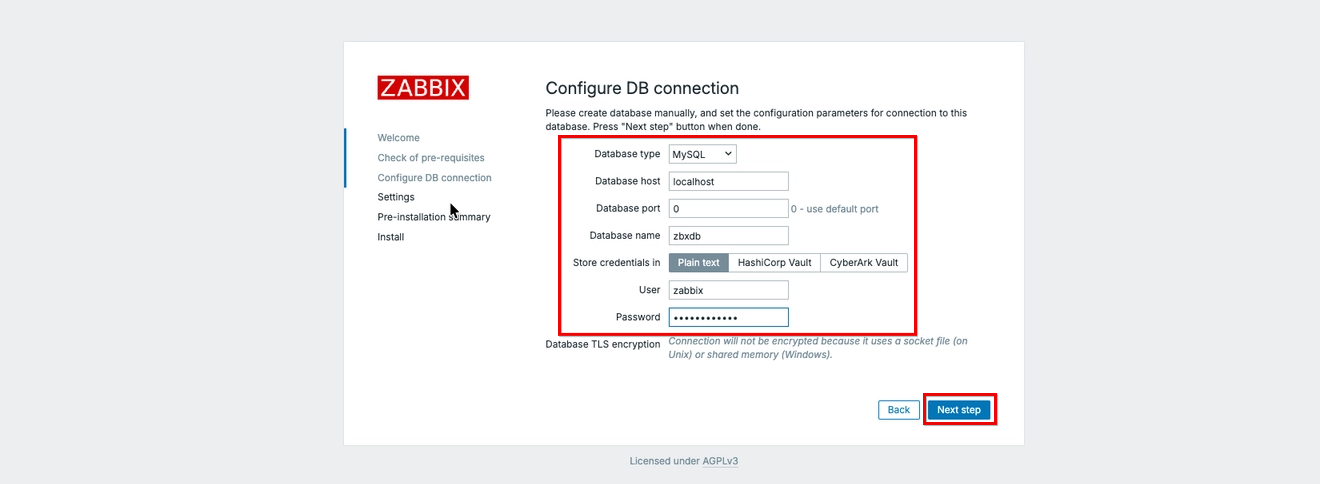
On Configuring DB Connection, configure your DB credential. leave Database host as Localhost because DB is running on same machine.
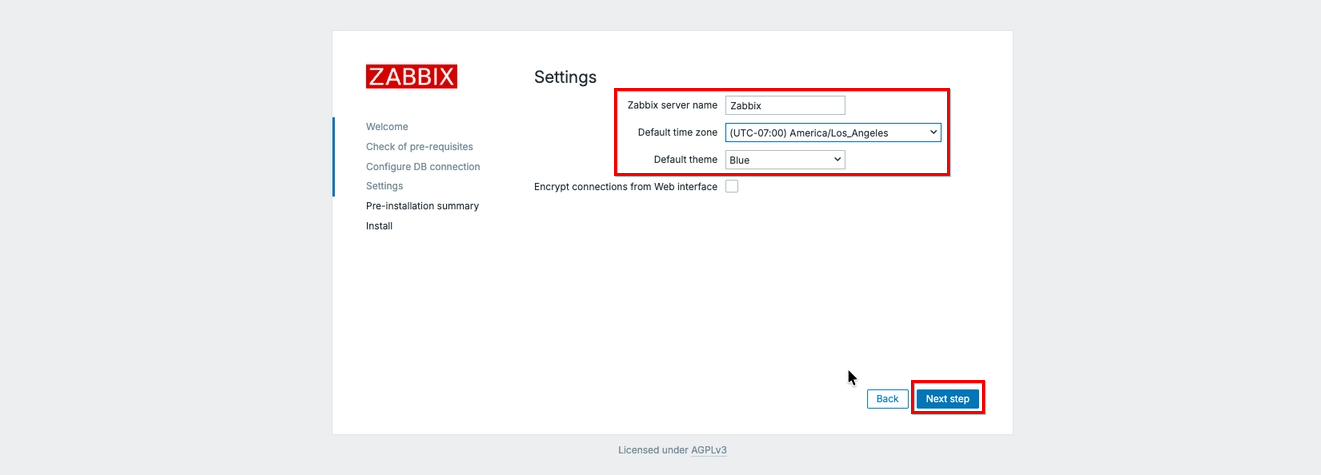
On Setting page, configure your zabbix server, timezone and default theme. You may enable “Encrypt connections from Web interface” if you have SSL certificate. you may enable it later too.
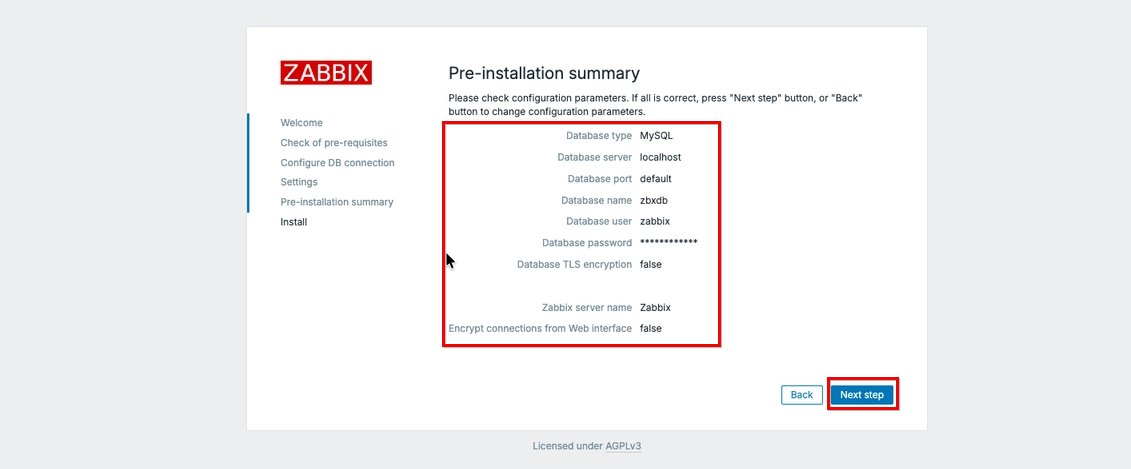
On Pre-installation summary page, we will see all the configured setting. If everything looks good, click Next step to finish installation.
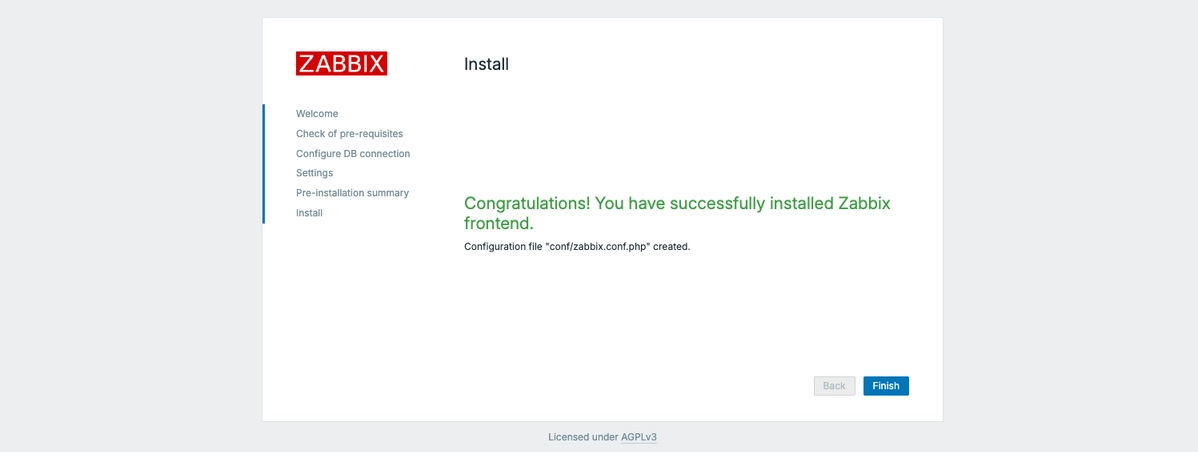
You will see Congratulation page, Click Finish to complete installation.
You will be redirected to Zabbix Login page. You can login via default login credential (Admin/zabbix)

Your zabbix installation is completed.